
Introduction
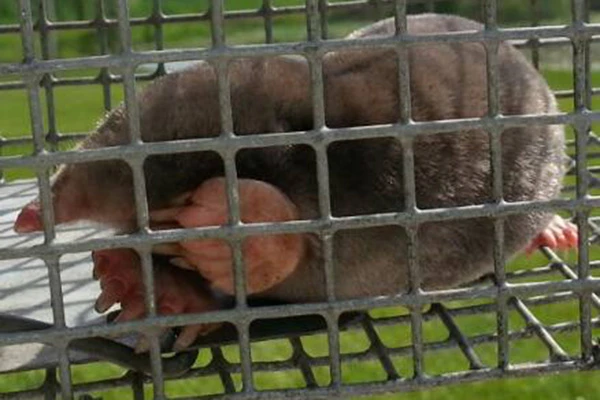
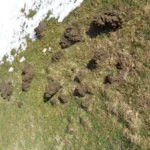
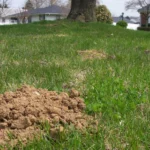
Are you tired of having your beautiful, well-manicured lawn ruined by pesky moles? These burrowing critters can wreak havoc on your garden and property, making it difficult to maintain the aesthetic appeal of your lawn. But fear not, because installing an underground fence can be the solution you have been looking for. Not only will it protect your lawn and garden from moles, but it will also save you from having to use harmful chemicals on your property.
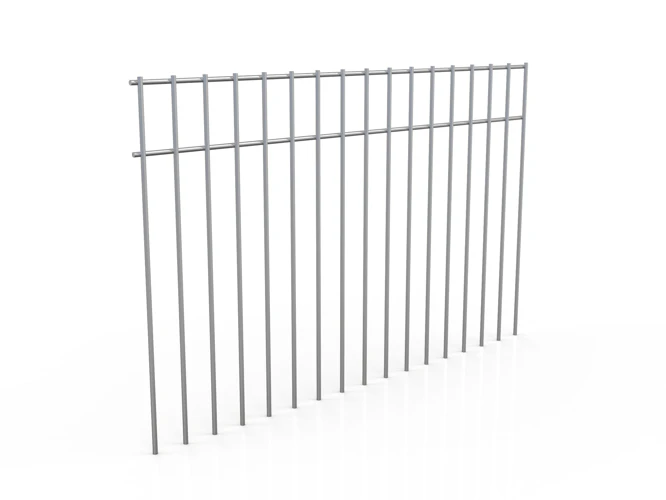
An underground fence works by creating a physical barrier that moles cannot penetrate. There are different types of fences available, ranging from wired and electric to perimeter and sonic repellent. However, the installation process for all these fences is similar. With a little planning and some basic materials, you can have a mole-free garden in no time.
In this article, we will guide you through the process of installing an underground fence step-by-step. From planning and marking the boundaries to digging the trench and connecting the fence, we will cover everything you need to know. We’ll also provide tips for maintenance and troubleshooting, so you can keep your fence in top condition. But first, let’s take a closer look at the different types of underground fences available.
Types of Underground Fences
There are four main types of underground fences to choose from:
Wired Fences: These fences consist of a series of wires that are installed underground to create a physical barrier. When a mole approaches the fence, it will hit the wire and trigger an alarm, causing the mole to turn around and retreat.
Sonic Repellent Fences: Sonic repellent fences use sonic waves to repel moles. The sound waves are emitted through a series of stakes that are planted in the ground along the perimeter of the fence.
Electric Fences: Electric fences deliver a mild shock to moles that come into contact with them, creating a deterrent effect. These fences are generally more effective than wired or sonic repellent fences, but they require more maintenance.
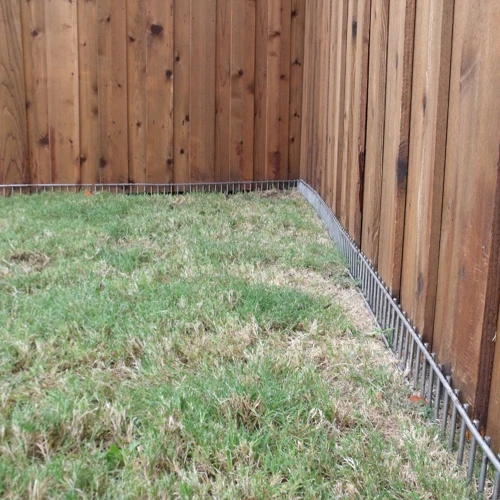
Perimeter Fences: Perimeter fences are similar to wired fences, but they use a physical barrier, such as chicken wire or mesh, instead of wires. These fences are installed by creating a trench around the perimeter of the area you want to protect and filling it with the barrier material.
Each of these fences has its own advantages and disadvantages, so it’s important to choose the one that best suits your needs. In the next section, we’ll dive into the steps you need to follow to install an underground fence.
So, let’s start planning!
Types of Underground Fences
When it comes to keeping moles from burrowing in your yard, there are several types of underground fences that you can consider. Each type of fence utilizes different technology to deter moles from entering your property. Some fences rely on wired barriers, while others use sound or electricity to ward off burrowing animals. If you’re interested in natural mole repellents, you may want to check out some of the best options available. Alternatively, you can create physical barriers using recycled materials as well. Let’s take a closer look at the different types of underground fences and how they can be installed to prevent moles from damaging your lawn and garden.
Wired Fences
One type of underground fence that can be used to prevent moles from burrowing is the wired fence. Wired fences are designed to deliver a mild electric shock to the soil, which deters moles from digging in that area.
Advantages:
- Effective in preventing moles from burrowing and causing damage to the lawn or garden.
- Does not harm the moles, but instead conditions them to avoid the areas where the fence is installed.
Disadvantages:
- Can be more expensive than other types of fences.
- Requires running wires under the ground, which can be time-consuming and labor-intensive.
To install a wired fence, follow the steps outlined in the “How to Install an Underground Fence” section. It is important to make sure that the wiring is properly connected and grounded to ensure that the fence is effective in deterring moles.
It’s important to note that wired fences may not be effective in all situations. If moles have already established tunnels in the area, they may avoid the fence altogether and continue to cause damage. In this case, other mole barriers such as garden barriers or DIY mole barriers made from recycled materials may be more effective.
Wired fences can be an effective way to prevent moles from burrowing and causing damage to the lawn or garden. It is important to carefully consider the advantages and disadvantages of this type of fence before deciding if it is the right solution for your particular situation.
Sonic Repellent Fences
One type of underground fence that you can use to prevent moles from burrowing in your yard is the sonic repellent fence. This type of fence emits a high-frequency sound that is unpleasant to moles and can deter them from entering your yard.
Unlike wired fences, sonic repellent fences do not require burying wires underground. Instead, they work by emitting a sound that travels through the soil, causing moles to flee. However, it’s important to note that these fences can be less effective if the soil is very dry or if there are obstructions like rocks or tree roots.
To install a sonic repellent fence, follow these steps:
| Step | Description |
|---|---|
| Step 1 | Choose the right type of sonic repellent fence for your yard. Some fences are designed to cover smaller areas, while others can cover up to an acre. |
| Step 2 | Plan the placement of your fence. Sonic repellent fences should be installed in areas where moles are active, such as near burrows or feeding areas. |
| Step 3 | Install the batteries in your sonic repellent fence according to the manufacturer’s instructions. Typically, these fences require several D-cell batteries. |
| Step 4 | Turn on the fence and adjust the frequency if necessary. Most fences allow you to adjust the frequency of the sound depending on the type of pest you want to repel. In this case, you would want to choose the setting for moles. |
| Step 5 | Place the fence posts in the ground according to the manufacturer’s instructions. The posts should be placed at regular intervals along the perimeter of the area you want to protect. |
| Step 6 | Connect the fence posts using the included wire or cords to create a complete circuit. This will ensure that the sound is emitted evenly across the entire area. |
Note: Sonic repellent fences are not recommended for use in areas with steep slopes or where the soil is very sandy. They are also less effective in areas with heavy vegetation. If you are looking for a more eco-friendly mole barrier, you may want to consider recycled materials as an alternative to sonic repellent fences.
Electric Fences
Electric fences are another type of underground fence used to prevent moles from burrowing in your lawn or garden. These fences work by giving a mild electric shock to any mole that attempts to dig through the ground. Here are some important factors to consider when installing an electric fence:
- Choose the right voltage: When selecting an electric fence, make sure you choose one with the appropriate voltage for moles. Too little voltage won’t deter moles, while too much can be dangerous and potentially lethal to other animals.
- Select a quality charger: The charger or energizer is the unit that powers the fence. Make sure to choose a high-quality, reliable brand for maximum effectiveness.
- Proper grounding: Grounding the electric fence is critical for its proper functioning. It’s important to follow the manufacturer’s instructions carefully and use the recommended materials for installation.
- Place warning signs: Electric fences can pose a hazard to pets and children, so make sure to place warning signs around the perimeter of the fence to alert anyone passing by.
Installing an electric fence requires the same planning and preparation as any other type of underground fence. Before installation, be sure to mark the boundaries of the area where you want the fence to go, and call to have utilities marked to avoid underground pipes or wires. Once the trench is dug, lay the wire in it and connect it to the charger. Test the fence regularly to ensure it’s functioning properly.
Keep in mind that electric fences require regular maintenance, including replacing batteries, checking the charger, and repairing any damage to the wiring. Additionally, if you’re experiencing issues with your electric fence, it’s best to seek professional help to avoid any potential safety hazards.
Perimeter Fences
Perimeter fences are another type of underground fence that can be used to prevent moles from burrowing in your yard. These fences work by emitting a frequency that moles find unpleasant, which causes them to avoid the area altogether. There are a few different types of perimeter fences to choose from, each with their own unique features and benefits.
One type of perimeter fence is the sonic spike fence. This type of fence consists of small, battery-operated stakes that are placed around the perimeter of your yard. When moles approach the area, the spikes emit a high-pitched frequency that is annoying to them, causing them to retreat.
Another type of perimeter fence is the solar-powered fence. This type of fence uses solar panels to power the system, making it an eco-friendly option. The fence emits a frequency that moles find unpleasant, causing them to avoid the area. The solar-powered fence is low maintenance since it doesn’t require batteries to function.
Lastly, there is the electronic perimeter fence. This fence uses a wired system to create a barrier around the yard. The wires emit an electromagnetic pulse that moles find uncomfortable, causing them to avoid the area. This type of fence requires professional installation and maintenance, but it is an effective option for larger yards.
No matter what type of perimeter fence you choose, it’s important to properly plan and install the fence to ensure its effectiveness. Digging the trench to lay the wires or place the sonic stakes can be time-consuming, but the end result will provide long-lasting protection against mole infestations in your yard.
How to Install an Underground Fence
Installing an underground fence to prevent moles from burrowing might seem like a daunting task, but with careful planning and proper execution, it can be a manageable project for any homeowner. In the following section, we will guide you through the essential steps on how to install an effective underground mole fence, from the initial planning to the final testing of the fence. So, put on your DIY hat, grab your tools and let’s start digging!
Step 1: Plan Your Fence
Planning is a crucial step in installing an underground fence to prevent moles from burrowing. Before you begin, take the time to carefully plan out your fence to ensure it is installed properly and effectively. Here are some steps to follow during the planning stage:
- Determine the layout: Decide on the area you want to protect and map out the boundaries of your fence. Consider any obstacles or landscaping that may affect the placement of the fence.
- Choose the type of fence: Select the appropriate type of fence based on your preference, the size of the area to be covered, and your budget.
- Measure the distance: Measure the distance of the perimeter of the area to determine how much fence wire will be needed.
- Determine the depth: Decide how deep to install the fence based on the size of the mole population in your area.
- Choose the power source: Select the appropriate power source, whether it is battery-powered, solar, or electric.
- Consider any additional accessories: Decide if you want to add any additional accessories, such as warning flags or markers.
By taking the time to properly plan your fence, you can ensure that it is effective in preventing mole disturbances in your lawn or garden. Remember to consider all factors and options before moving on to the installation stage.
Step 2: Call Before You Dig
Step 2: Before beginning any excavation, it’s important to call the appropriate authorities to check for any buried utility lines. This is essential for your safety and to prevent damage to any existing infrastructure. Follow these steps to ensure that you are digging safely:
- Find out who to contact: Contact the local utility company or an underground utility line locator service.
- Provide details of the excavation: Give them the location and purpose of the excavation, as well as the expected duration and depth of the digging.
- Wait for clearance: Wait for the confirmation from the utility company or locator service that it’s safe to dig. This may take a few days, so plan accordingly.
- Mark the location: Use spray paint or flags to mark the area where you plan to dig. This will help you avoid any buried lines during the excavation process.
Remember, failure to call before you dig can result in costly and dangerous accidents. Take the necessary precautions to ensure the safety of yourself and those around you.
Step 3: Gather the Materials
Before you start installing an underground fence to prevent moles from burrowing, you need to gather all the necessary materials. This includes:
| Materials | Description |
| Wire | A high-quality wire that is suitable for underground use. Make sure it is long enough to cover the entire perimeter of your fence. |
| Posts | These are used to securely anchor the fence. Choose durable, rust-resistant posts that can withstand outdoor weather conditions. |
| Batteries | If you are using an electric or sonic repellent fence, you’ll need to have extra batteries on hand. Make sure you choose batteries that are compatible with your fence. |
| Trencher or Shovel | A tool to dig the trench where you’ll be placing the fence. A trencher is recommended for larger areas, while a shovel is more suitable for smaller ones. |
| Connectors | These are used to join together different sections of the wire. Make sure you choose connectors that are high-quality and recommended for underground use. |
| Flags | Flags can be used to mark the boundaries of your fence. They will help you visualize where the fence needs to go and make it easier to install. |
It’s important to make sure that you have all the necessary materials before you begin. This will save you time and hassle later on. Once you have everything you need, you can move on to the next step of the installation process.
Step 4: Mark the Boundaries
Step 4: Mark the Boundaries
Before digging the trench for the underground fence, it’s important to mark the boundaries of the area you want to protect. This will ensure that the fence is installed in the proper location and that it effectively prevents moles from burrowing.
To mark the boundaries, you will need to gather some materials, including flags, measuring tape, and a diagram of your property. Follow these steps to mark the boundaries:
| Step | Action |
| 1. | Start at one corner of your property and use the measuring tape to measure the distance to the next corner. |
| 2. | Place a flag in the ground at each corner to mark the boundary. |
| 3. | Continue measuring and flagging the boundary until you have marked the entire area you want to protect. |
| 4. | Refer to the property diagram to ensure that the flags are placed in the correct location. |
It’s important to be precise when marking the boundaries to ensure that the fence is installed in the proper location. If the fence is not installed along the boundary, moles may still burrow into the protected area. Once the boundaries have been marked, you can move on to the next step of the installation process.
Step 5: Dig the Trench
Digging the trench is a crucial step towards installing an underground fence. Below is a table outlining the details of this step:
| Step | Description |
|---|---|
| 1. | Using the markings made in Step 4, start digging the trench along the boundary line using a trenching tool. The recommended depth for the trench is at least 6 inches to ensure the fence is underground and out of reach of moles. |
| 2. | Remove any rocks, roots, or debris along the way to prevent damage to the fence wire or to avoid creating gaps in the barrier that moles may take advantage of. |
| 3. | It’s important to keep the trench straight and make it deep enough as you progress along the boundary line. Remember, the more accurate and straight the trench is, the better the chance that the fence will function properly. |
| 4. | As you approach turns or corners, make sure to bend the fence wire at a 90-degree angle to turn it around the corner. This helps to ensure the wire is properly installed and that there are no gaps in the fence at the corners. |
| 5. | Once the trench is dug, test the fence wire to make sure it’s working correctly before filling the trench back up. You can use a fence tester to check the voltage and determine if there are any problems with the fence wire. |
By following these step-by-step instructions, you’ll be able to dig a straight and properly functioning trench for your underground fence, which will keep moles from burrowing into your yard.
Step 6: Install and Connect the Fence
To install and connect the underground fence, follow these steps:
- Attach the electrodes: Before attaching the electrodes to the wired fence, ensure that they are clean and free from any dirt or debris. Connect each electrode to the fence wire using the included connectors.
- Connect the transmitter: Connect the wired fence to the transmitter using the wires provided. Ensure that the transmitter is placed in a secure, dry location and plugged into a power source.
- Lay the fence in the trench: Carefully lay the wired fence into the trench, taking care not to damage the electrodes in the process. Straighten out any kinks in the fence wire, and ensure that it is lying flat and even along the trench.
- Connect the ground wire: Attach the ground wire to the transmitter and bury it at least six inches deep in the ground away from any metal objects.
- Fill in the trench: Once the fence is in place, carefully fill in the trench with dirt and ensure that the fence remains in its designated location.
- Turn on the power: Turn on the power to the transmitter and check that the fence is emitting a strong signal. Adjust the signal strength if required.
Note: It is important to follow the manufacturer’s instructions carefully when installing and connecting your underground fence. Failure to do so may result in the fence not working correctly, which can be dangerous for your pets and wildlife.
Step 7: Test the Fence
Before relying on your underground fence to prevent moles from burrowing, you will need to test the efficiency of the fence. The testing process ensures that the fence is appropriately installed and functioning correctly to prevent moles from burrowing into your yard. Testing your underground fence is a crucial step for the safety of your garden or lawn. Follow the steps given below to test the fence:
| Step | Task |
| — | — |
| 1 | Turn on the electric fence charger. |
| 2 | Take the voltage tester or neon light and place it inside the ground, so it touches one the fence’s wire. |
| 3 | Observe the voltage reading on the tester or bulb. |
| 4 | Move the tester or bulb along the fence’s wire. |
| 5 | Ensure that there is no voltage drop along the entire length of the wire. |
| 6 | Test the fence in moist weather conditions, as moist conditions are when moles are most active. |
| 7 | If the voltage drop is observed, locate and fix the fault in the fence. |
Testing the underground fence is a crucial step, so that you can genuinely feel secure that the fence is working to prevent moles from burrowing. If you find a fault in the fence, it is crucial to fix it promptly to ensure that your garden remains mole-free.
Maintenance and Troubleshooting
Once you have installed your underground fence to prevent moles from burrowing, it’s important to maintain and troubleshoot the system to ensure it continues to work effectively. This involves regular checks to make sure the fence is still intact and secure, repairing any damage that may occur, and replacing batteries as needed. In this section, we will explore the key steps involved in maintaining and troubleshooting your underground mole fence. So, let’s dive in and explore how to keep your fence in top condition!
Check the Fence Regularly
Regular checking of the underground fence is very important to ensure that it continues to function properly and keep the moles from burrowing into the protected area. It is recommended to check the fence at least once a month or after heavy rain. Checking the fence regularly can identify any issues and prevent further damage.
Here are some steps to follow when checking your underground fence:
- Walk the perimeter of the fence line and examine the area for any signs of burrowing or damage.
- Check the fence system and wires for any visible wear or exposed wires. Replace any damaged components that are discovered.
- Make sure that the connections and contacts are solid and not loose, as this can cause the fence to malfunction.
- Test the battery life of the fence controller and replace the batteries as needed to ensure that the fence continues to function properly.
- Check that the fence is properly grounded to prevent electrical surges that could damage the fence system or harm the moles.
- Record your findings during each check-up so that you can track the performance of the fence system over time.
By checking the underground fence regularly, you can ensure that it functions properly and keep your yard free from moles. It is important to take any necessary steps to repair or replace any issues that are discovered during the checks to keep the fence operational at all times. Regular checks will save you money in the long run by preventing costly repairs and the need for professional assistance.
Repair the Fence if Damaged
Regularly checking and maintaining your underground fence is crucial to ensure that it continues to effectively prevent moles from burrowing into your yard. If you notice any damage to the fence, it is important to repair it as soon as possible to prevent moles from finding their way through the gap. Here are some steps to follow when repairing your fence:
- Step 1: Locate the damaged section of the fence by using a signal transmitter and receiver. This will help you pinpoint the exact location of the damage without needing to dig up the entire fence.
- Step 2: Carefully excavate around the damaged section of the fence. Use a small shovel or trowel to avoid damaging the fence any further.
- Step 3: Assess the extent of the damage. If the damage is minor, such as a wire break, you may be able to repair it yourself. However, if the damage is significant, such as a crushed wire or a damaged connector, you may need to replace the entire section of the fence.
- Step 4: If the damage is minor, use a wire splicer to reconnect the broken wires. Make sure to follow the manufacturer’s instructions carefully to avoid any further damage to the fence.
- Step 5: If the damage is significant, remove the damaged section of the fence and replace it with a new section. Connect the new section using waterproof connectors, and bury it securely in the trench.
- Step 6: Once the repair is complete, test the fence again to ensure that it is functioning properly.
Remember, proper maintenance and prompt repairs are key to ensuring that your underground fence continues to do its job effectively. By taking the time to check your fence regularly and repair any damage as soon as it occurs, you can keep your yard mole-free and enjoy a beautiful lawn and garden for years to come.
Replace Batteries Regularly
One important aspect of maintaining your underground fence is to make sure the batteries are replaced regularly. Without sufficient power, the fence will not function as intended and moles may start burrowing within the area. Here are some important things to keep in mind when replacing the batteries:
- Check the manufacturer’s recommendations: Different fences may require different types or sizes of batteries, so it’s important to follow the manufacturer’s recommendations for replacement.
- Use high-quality batteries: To ensure the best operation of your fence, it’s important to use high-quality batteries. Cheaper batteries may not last as long or provide enough power to keep the fence functioning properly.
- Keep track of when batteries were last replaced: It’s a good idea to keep a record of when you last replaced the batteries so you can stay on schedule for future replacements.
- Replace batteries in a timely manner: When you notice the batteries starting to lose power, it’s important to replace them as soon as possible. Waiting too long may result in the fence not functioning and giving moles an opportunity to burrow into the area.
- Dispose of old batteries properly: When removing old batteries, make sure to dispose of them properly. Many towns and cities have recycling programs for batteries, so look for options in your area.
By keeping up with battery replacements and following manufacturer recommendations, you can ensure the proper functioning of your underground fence and prevent burrowing moles from causing damage to your property.
Professional Help
If you have tried all the troubleshooting steps and still find that your underground fence isn’t working properly, it might be time to seek professional help. Here are some reasons why you might need a professional:
- Complicated Installation: If the installation of your underground fence is particularly complicated, such as if it involves a large area or different types of fences, it might be best to hire a professional to ensure that everything is done correctly.
- Technical Expertise: Some fences, such as electric fences, might require technical expertise that you don’t have. A professional can help install and maintain these fences to ensure that they are safe and effective.
- Specialized Equipment: Some parts of the installation process might require specialized equipment that you don’t have on hand. A professional will have the necessary tools to get the job done right.
- Guarantees and Warranties: When you hire a professional, you often get guarantees and warranties that your fence will be installed and maintained correctly. If something goes wrong, the professional will be responsible for fixing it.
- Saves Time: Installing an underground fence can be time-consuming, particularly if you aren’t familiar with the process. By hiring a professional, you can save time and get back to your normal routine faster.
Remember that hiring a professional comes at a cost, so make sure to factor that into your budget when considering your options. However, if you want the peace of mind that comes with knowing that your underground fence is installed and working correctly, a professional might be the best option for you.
Conclusion
In conclusion, installing an underground fence can be a simple and effective way to prevent moles from burrowing in your yard. Choosing the right type of fence for your needs and following the installation steps carefully will ensure the best results. Remember to always plan and mark the boundaries before digging, and to call before you dig to avoid any potential hazards.
Regular maintenance of the fence, such as checking for damage and replacing batteries, is crucial for its effectiveness. If you encounter any troubles, consult a professional for help.
By following these steps, you can have a beautiful and mole-free lawn in no time. Don’t let pesky moles ruin your yard – take action and install an underground fence today!
Frequently Asked Questions
How long do underground fences typically last?
Underground fences can last anywhere from 5-15 years, depending on the type and quality of the fence.
Do underground fences harm moles or other animals?
No, underground fences simply act as a preventative measure to keep moles and other animals from burrowing in the protected area.
What is the cost of an underground fence installation?
The cost of an underground fence installation varies depending on the size of the area to be protected and the type of fence chosen, but on average it can range from $500 to $2000.
Can I install an underground fence myself?
Yes, it is possible to install an underground fence yourself, but it is recommended to hire a professional for best results.
What is the depth of the trench for an underground fence?
The trench for an underground fence should be approximately 1-3 feet deep.
Can I use an underground fence to protect my entire yard?
Yes, it is possible to install an underground fence to protect your entire yard, but it will require a larger quantity of materials and a more complex installation process.
How do I know if my underground fence is working properly?
You can test your underground fence using the collar included in the installation kit. Walk around the perimeter with the collar and make sure it beeps or vibrates when you reach the boundaries.
What should I do if my underground fence stops working?
First, check the batteries in the collar to make sure they are fully charged. If the batteries are not the issue, check the wiring and connections for any damage or disconnections. If necessary, hire a professional to assist with repairs.
Can I use an underground fence for animals other than moles?
Yes, underground fences can also be used to protect against other burrowing animals such as groundhogs and rabbits.
Do I need to regularly maintain my underground fence?
Yes, it is important to regularly check the fence for any damage, replace batteries as needed, and address any issues promptly to ensure the fence continues to effectively protect against burrowing animals.