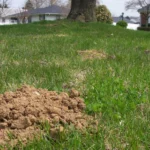
When it comes to maintaining a beautiful garden or lawn, moles can be a frustrating problem to deal with. These burrowing creatures can quickly ruin the aesthetics and health of your yard. While there are several traditional methods used for mole control, such as trapping and poison, some gardeners may be hesitant to use these options for safety and ethical reasons. Luckily, there is a natural and effective alternative to keep moles away from your garden – repellent plants. In this article, we will explore the top repellent plants for mole control, their benefits, and how to plant them in your garden.
Why Choose Repellent Plants?
When it comes to mole control, there are various methods to choose from. However, using repellent plants might be the best choice for those looking for a natural yet effective solution. In this section, we will explore the reasons why repellent plants are the way to go when it comes to dealing with moles, and why you should consider using them in your yard or garden. From being naturally safe and cost-effective, to adding an aesthetic appeal, there are a plethora of reasons why repellent plants are a smart choice. Learn more about the benefits of repellent plants in our article Benefits of Repellent Plants for Mole Control.
1. Naturally Safe and Effective
Using repellent plants for mole control is naturally safe and effective. Unlike chemical repellents, which can be harmful to pets and children, these plants provide a non-toxic solution to mole control. They work by emitting scents or toxins that are unpleasant to moles, causing them to stay away from the area. These plants are easy to find and cost-effective, making them a great alternative to expensive pest control services.
Here is a table that highlights the benefits of using repellent plants for mole control:
| Benefits of Repellent Plants for Mole Control |
| Naturally safe and non-toxic |
| Effective in deterring moles from the area |
| Cost-effective compared to other pest control methods |
| Aesthetically pleasing for any garden or landscape |
| Easy to maintain and care for |
Using repellent plants for mole control is a safe, effective, and cost-effective solution for homeowners. For more information on the top repellent plants that moles despise, check out our article on The Most Effective Repellent Plants for Mole Control. Also, make sure to read our guide on How to Care for Repellent Plants to ensure their long-term success in your garden.
2. Cost-Effective
When it comes to controlling mole infestations, many people turn to costly and potentially harmful solutions like pesticides or traps. However, using repellent plants to deter moles is a much more cost-effective option. These plants can be purchased for a fraction of the cost of other methods and can provide long-lasting protection against moles.
Not only are repellent plants an inexpensive option, but they are also a one-time investment that can keep moles at bay for years. While some plants may need to be replaced after a few seasons, many can thrive for years with proper care. This makes them a practical and low-maintenance solution for those looking to control mole infestations without breaking the bank.
In addition to their affordability, using repellent plants for mole control also has other financial benefits. For example, by naturally deterring moles from your garden, you can avoid costly damage to your plants and crops that these pests are notorious for causing. This can save you a significant amount of money in the long run and provide peace of mind knowing that your plants are protected.
For those who are looking to use repellent plants to control moles, there are several resources available online. From articles on natural mole repellents plants to step-by-step guide on DIY repellent plant for moles, there are plenty of options for those who want to take a more natural approach to pest control. Additionally, many online retailers offer a wide selection of plants that are known for their mole-repelling qualities, making it easy to find the right plant for your needs.
Using repellent plants is a smart and cost-effective choice for those looking to control mole infestations in their gardens. With their many benefits and low cost, it’s no wonder that they have become a go-to solution for homeowners and gardeners alike.
3. Aesthetically Pleasing
When it comes to controlling moles in your garden, you want to choose repellent plants that not only keep these pests away but also enhance the visual appeal of your space. The aesthetically pleasing aspect of repellent plants is important for those who are mindful of the overall look and feel of their gardens. The good news is that there are several repellent plants that not only keep moles away but also add colorful and vibrant tones to your outdoor space.
One such plant is Marigolds. These plants are known for their bright colors and distinctive scent, which makes them a great natural deterrent for moles. Marigolds are low-maintenance and require minimal care to thrive, making them a favorite among gardeners. Additionally, they are also beneficial for the soil as they emit a substance that repels harmful nematodes and other pests.
Another plant that serves as a natural mole repellent is Daffodils. These bright yellow flowers not only add a pop of color to your garden but also release a substance that actively repels moles. Daffodils are easy to plant and require little maintenance, making them a perfect addition to any garden.
Aside from their mole-repelling properties, Alliums are also valued for their ornamental qualities. These plants can grow up to 4 feet tall and their large, spherical blooms pack a punch of color to any garden. Alliums deter moles with their strong smell and taste, which disrupts the moles’ ability to locate their prey underground.
In addition to the above, Fritillaries are another great option for controlling mole activity in your garden. They are particularly effective at repelling moles due to their musky scent that is hard for the pests to tolerate. Fritillaries come in many unique color variations and can add visual interest to any garden.
Finally, Castor beans are also an excellent mole repellant. Not only do they have a strong odor and taste that moles dislike, but they also emit a toxin that is harmful to the pests. Castor beans are quite eye-catching and bring a touch of tropical style to your garden.
Choosing repellent plants for mole control not only helps keep your garden pest-free but also enhances its beauty. Incorporating these plants into your gardening routine can be an effective and cost-efficient way to keep moles at bay while enjoying a visually stunning outdoor space. For more information on how to use repellent plants to keep moles away, check out our article on How to Use Repellent Plants to Keep Moles Away. You can also read our article on the Top 5 Mole Repellent Plants or learn more about how repellent plants deter moles by reading our article on Repellent Plants That Deter Moles.
The Top Repellent Plants for Mole Control
As you strive to ward off moles from your garden, you must be wondering which plants can help you achieve this. Thankfully, nature has given us an array of repellent plants to choose from. These plants are not only beautiful additions to your garden, but they also emit odors that drive away moles. In this section, we will look at six of the most effective repellent plants for mole control and explore how they can help keep your garden mole-free.
1. Daffodils
Daffodils are a beautiful addition to any garden and happen to be a natural repellent to moles. This bright yellow flower contains lycorine, a substance that is toxic to moles. Here are some benefits of planting daffodils for mole control:
| Benefits of Daffodils |
| 1. Repellent to moles |
| 2. Low-maintenance flower that thrives in most soil types. |
| 3. Daffodils are deer, rodent, and rabbit-resistant, making them a great addition to any garden. |
If you decide to plant daffodils to keep moles away, here are some tips on how to plant them:
| How to Plant Daffodils |
| 1. Plant bulbs in the fall, approximately 6 inches deep and 4-6 inches apart. |
| 2. Daffodils grow best in full sun to partial shade and in well-drained soil. |
| 3. Don’t remove the leaves after the blooms have died, as they provide nutrients back to the bulb for the following year. |
Planting daffodils is a natural way to keep moles at bay while also adding beauty and color to your garden.
Benefits of Daffodils
Daffodils are not only a beautiful addition to any garden, but they also have natural repellent qualities that can help control mole populations. Some benefits of planting daffodils include:
- Natural Deterrent: Daffodils contain lycorine, a natural toxin which can be harmful to moles when ingested. The scent of daffodils is also believed to be repulsive to moles, keeping them at bay.
- Easy to Grow: Daffodils are a low-maintenance plant that requires very little attention once planted. They are also quite hardy and can tolerate a range of soil and weather conditions.
- Long-Lasting: Daffodils are perennials, meaning they will come back year after year without needing to be replanted. This makes them a cost-effective and long-lasting solution for mole control.
- Attractive Appearance: Daffodils are known for their bright yellow or white color and distinctive trumpet-shaped blossoms, which can add beauty and visual interest to your garden.
By incorporating daffodils into your yard, you can enjoy both their aesthetic appeal and their practical benefits for keeping moles away. With proper planting and care, daffodils can be an effective natural repellent for these pesky burrowing mammals.
How to Plant Daffodils
To plant daffodils, follow these simple steps:
| Step 1: | Choose the right location – daffodils thrive in moist but well-drained soil with partial to full sun. |
| Step 2: | Prepare the soil – loosen the soil to a depth of 12 inches and add organic matter, such as compost or well-aged manure, to increase nutrient availability and drainage. |
| Step 3: | Plant the bulbs – dig holes 6 inches deep and 4 to 6 inches apart, placing each bulb with the pointed end facing upwards. Cover with soil and gently press down. |
| Step 4: | Water thoroughly – water the bulbs right after planting and regularly thereafter, keeping the soil consistently moist but not waterlogged. |
| Step 5: | Mulch the area – add a layer of mulch, such as shredded leaves, straw or bark chips, to conserve moisture and suppress weed growth. |
| Step 6: | Care and maintenance – daffodils require minimal care and maintenance, but be sure to deadhead spent blooms and remove yellowing foliage to prevent the spread of fungal diseases. |
By following these steps, planting daffodils in your garden can help repel moles and add a gorgeous touch of yellow to your landscaping.
2. Alliums
When it comes to natural mole repellents, Alliums are a popular choice for gardeners. Alliums are a group of plants that belong to the onion family and are known for their strong aroma which drives moles and other rodents away.
| Benefits of Alliums | How to Plant Alliums |
|---|---|
| Alliums act as a natural repellent for moles and other rodents, keeping them away from your garden. | To plant Alliums, first, choose an open and sunny location with well-drained soil. |
| They are easy to grow and require minimal maintenance. | Then, dig holes that are around two to three times the size of the Allium bulbs, and plant them in the holes with the pointed side facing up. |
| Alliums add a pop of color to your garden with their beautiful purple blooms. | Ensure that you leave enough space between each Allium bulb to allow for optimal growth, generally about 6 inches apart. |
| Alliums can be used in various cooking styles and have many health benefits. | Water them regularly after planting, and they will flower in mid to late summer. |
Alliums can be easily found at most nurseries and gardening centers. They are a versatile and cost-effective option for those looking for a natural way to keep moles away from their garden. However, it is worth noting that Alliums can also deter beneficial insects, so it is important to plant them strategically in your garden.
Benefits of Alliums
One of the most effective repellent plants for mole control is the Allium. Let’s take a look at some of the benefits of planting Alliums in your garden:
| Benefit | Explanation |
| Natural repellant | Alliums contain a high concentration of sulfur compounds, which give them their pungent aroma that moles find unpleasant. |
| Deters other pests | The scent of Alliums not only repels moles but other garden pests such as aphids, slugs, and cabbage worms. |
| Low maintenance | Alliums are easy to grow and require minimal care once they are established, making them a hassle-free addition to your anti-mole arsenal. |
| Aesthetically pleasing | Alliums are known for their striking, spherical blooms that come in a variety of shades, ranging from white to deep purple. They can add a pop of color and an air of sophistication to any garden. |
Alliums are a natural, long-lasting, and visually appealing method for repelling moles, making them a great choice for any gardener looking to keep these pesky critters away from their lawn and garden.
How to Plant Alliums
Planting alliums is a fairly simple process that can be done in the fall or spring. Here’s a step-by-step guide on how to plant alliums:
| Step | Description |
|---|---|
| 1 | Choose a location: to plant alliums, you need a location that gets full sun exposure and has well-draining soil. It is important to make sure that the area is not waterlogged as alliums do not tolerate sitting in water. |
| 2 | Prepare the soil: loosen the soil to a depth of at least 12 inches and mix in a good amount of compost or peat moss. This will help to improve the drainage of the soil and provide the alliums with the nutrients they need to grow. |
| 3 | Plant the bulbs: dig a hole that is twice as deep as the height of the bulb, and space the bulbs 6 to 8 inches apart. Place the allium bulb into the hole with the pointed end facing upwards. |
| 4 | Backfill the hole: once the bulb is in place, backfill the hole with soil and gently press the soil down to remove any air pockets. |
| 5 | Water the area: water the area thoroughly after planting, and continue to water as necessary, making sure that the soil stays moist but not waterlogged until the alliums have become established. |
| 6 | Mulch the area: apply a layer of mulch around the allium plants to help retain moisture in the soil and keep the weeds at bay. |
Follow these simple steps and your alliums should grow and thrive, helping to keep moles at bay.
3. Marigolds
Marigolds are vibrant annual plants that have been known for their unparalleled beauty and pest-repellent properties. These easy-to-grow plants are a popular choice among gardeners looking to keep moles and other burrowing animals away. Here are the benefits and instructions on how to plant marigolds for mole control.
| Benefits of Marigolds | How to Plant Marigolds |
|---|---|
|
|
Adding marigolds to your garden is a great way to naturally control mole populations while also adding beauty and vibrancy to your outdoor space. With their ease of growth and low-maintenance requirements, marigolds are a solid choice for a pest-repellent plant.
Benefits of Marigolds
Marigolds are a popular choice for mole control due to their strong scent, which the pests find repugnant. But what are the other benefits of planting marigolds in your garden? Let’s take a look:
| Benefit | Description |
| Natural insect repellent | Marigolds emit a scent that not only deters moles but also other insects such as aphids and whiteflies. |
| Easy to grow | Marigolds are low-maintenance and require minimal attention to grow, making them an ideal choice for those new to gardening. |
| Attractive flowers | Marigolds produce vibrant, colorful blooms that can add a pop of color to any garden. |
| Companion plant | Marigolds are also beneficial for neighboring plants, improving their growth and deterring harmful pests like nematodes. |
| Cost-effective | Marigold seeds are inexpensive, and the plants can easily be propagated from cuttings or seedlings, making them a cost-effective option for mole control. |
Planting marigolds can provide a natural and cost-effective solution for mole control while also adding beauty to your garden. Their easy maintenance and ability to repel a variety of harmful insects make them a worthwhile addition to any garden.
How to Plant Marigolds
Planting marigolds is fairly easy and can be done in a few simple steps. Here’s how to plant marigolds:
Step 1: Choose the right location
Marigolds need full sun to thrive, so make sure to choose a location that gets at least 6 hours of sunlight per day. They also prefer well-draining soil, so avoid areas that tend to get waterlogged.
Step 2: Prepare the soil
Before planting, loosen the soil to a depth of at least 6 inches and remove any rocks, weeds, or debris. You can also mix in some compost or organic matter to help improve soil fertility and drainage.
Step 3: Plant the seeds
Once the soil is ready, it’s time to plant the marigold seeds. Sow the seeds about 1 inch apart and cover them with a thin layer of soil (about 1/4 inch deep). Water the seeds gently but thoroughly.
Step 4: Care for the seedlings
After about a week or two, the marigold seedlings should start to emerge. Keep the soil moist, but not waterlogged, and thin out any overcrowded seedlings to ensure proper spacing (about 6-8 inches apart). You can also add a layer of mulch around the seedlings to help retain moisture and suppress weeds.
Step 5: Enjoy your marigolds!
With proper care, your marigold plants should start blooming in about 6-8 weeks. Deadhead (remove) spent flowers regularly to encourage more blooms, and fertilize every few weeks with a balanced fertilizer. And of course, sit back and enjoy the beauty and pest-repelling benefits of your marigold plants!
4. Fritillaries
Fritillaries are another effective repellent plant for mole control. These beautiful plants not only help deter moles, but they also add a stunning touch to your garden. Here are some benefits of planting fritillaries:
| Benefits |
|---|
| Natural Deterrent: The scent of fritillaries naturally deters moles from invading your yard or garden. |
| Attractive Appearance: Fritillaries are known for their unusual bell-shaped flowers and unique coloring, making them a beautiful addition to your garden. |
| Easy to Grow: Fritillaries are relatively easy to grow, making them a great option for gardeners of all levels. |
If you are interested in planting fritillaries in your garden to help control moles, here is how to do it:
How to Plant Fritillaries
1. Find a suitable location: Fritillaries prefer well-drained soil in partial or full sunlight, so choose a location in your garden that meets these requirements.
2. Purchase bulbs: You can typically find fritillary bulbs at your local garden center or online. Choose healthy-looking bulbs to ensure successful growth.
3. Plant the bulbs: Plant fritillary bulbs in the fall for springtime blooms. Dig holes 4-6 inches deep and place the bulbs with the pointy side facing up. Cover the bulbs with soil and water thoroughly.
4. Care for your fritillaries: Once your fritillaries begin to grow, water them regularly and fertilize with a balanced fertilizer once or twice a year.
By adding fritillaries to your garden, you can help control mole populations while also creating a beautiful and unique landscape.
Benefits of Fritillaries
Fritillaries are not just a beautiful addition to any garden, but they also serve as effective repellent plants for moles. These elegant plants have many benefits that make them a great choice for mole control. Some of the benefits of planting fritillaries in your garden to ward off moles include:
- Strong Scent: Fritillaries have a subtle yet strong scent that moles find offensive, making them ideal for repelling these burrowing creatures.
- Natural Toxin: These plants contain a natural toxin called imperialin, which is toxic to moles but harmless to humans and other animals.
- Easy to Grow: Fritillaries are relatively easy to grow and require little maintenance, making them a great choice for novice gardeners or those with busy schedules.
- Attractive Appearance: Fritillaries have unique and eye-catching flowers that add a touch of elegance and beauty to any garden.
- Deter Other Pests: In addition to repelling moles, fritillaries are also effective in deterring other common garden pests, such as rodents and squirrels.
By planting fritillaries, you can effectively control mole infestations in your garden while also enjoying the many benefits these plants have to offer. Whether you’re looking for a natural and non-toxic repellent or simply want to add an elegant touch to your garden, fritillaries are definitely worth considering.
How to Plant Fritillaries
Planting Fritillaries:
Fritillaries are easy to grow and require minimal maintenance. They grow from bulbs, which should be planted in autumn, as the soil begins to cool down. Here’s a step-by-step guide to planting fritillaries:
| Step | Action |
|---|---|
| Step 1 | Choose a well-drained spot in your garden that has full or partial sun exposure. |
| Step 2 | Loosen the soil to a depth of at least 8 inches and add organic matter to the soil. |
| Step 3 | Plant the bulbs about 3-4 inches deep and 3-4 inches apart, with the pointed end facing up. |
| Step 4 | Water the bulbs well after planting and regularly throughout the growing season. |
| Step 5 | Fritillaries do not require fertilization, but you can add a slow-release fertilizer before planting if desired. |
Note: Fritillaries are toxic if ingested, so keep pets and children away from the plants.
5. Castor Beans
Castor beans, or Ricinus communis, are among the most potent mole repellent plants. They contain a toxic protein called ricin that repels not only moles but also insects and other small animals. However, it is important to note that ricin can also be harmful to humans and pets, so caution must be taken when planting castor beans.
Aside from their strong repellent properties, castor beans have several other benefits:
| Benefits of Castor Beans |
|---|
| Can grow in a variety of soil types |
| Can grow up to 15 feet tall, providing a natural barrier |
| Produces large, attractive leaves |
| Can be used to create natural dyes and as a remedy for certain ailments |
It is important to handle castor beans with caution as they contain ricin, which can be toxic. It is recommended to wear gloves and avoid inhaling any dust from the seeds or plant.
To plant castor beans, follow these steps:
- Choose a sunny spot with well-draining soil.
- Dig a hole that is twice as deep as the seed and place the seed in the hole.
- Cover the seed with soil and water well.
- Water regularly, but make sure not to overwater as castor beans do not like wet feet.
- The seeds will germinate within two to three weeks.
Castor beans can grow very tall, so make sure to plant them away from any buildings or structures. They are also prone to fungal diseases, so it is important to keep the soil dry and well-drained.
Castor beans are a strong and effective natural repellent for moles, but they must be handled with caution due to their toxicity. They also have several other benefits, such as providing a natural barrier and producing attractive leaves. If planted properly, they can be a valuable addition to any garden or landscape.
Benefits of Castor Beans
Castor beans plants are often sought-after when choosing plants for mole control. This is because they have a range of benefits that makes them a great choice in repelling moles.
Benefits of Castor Beans:
| Benefit | Description |
| Repels Moles | Castor beans contain a toxic compound called Ricin, which is poisonous to many animals, including moles. The smell of the plant’s oil also masks surrounding scents, making moles less likely to detect their prey. |
| Aids Soil Health | Castor beans are known to be a perfect crop for crop rotation because they’re nitrogen-fixing plants. They extract nitrogen from the environment and fix it in the ground, which increases soil fertility and overall soil quality. |
| Attractive Appearance | Castor beans are attractive plants that add a touch of beauty to any garden. They have large, lush leaves and bright colors, which makes them an excellent aesthetic addition to any garden. |
| Multipurpose Plants | Castor oil, which is extracted from castor beans, is used for various medicinal and cosmetic purposes. The oil also has industrial applications, such as in the manufacturing of lubricants, paints, and plastics. |
Castor beans are an excellent choice when it comes to mole control. They are affordable, low-maintenance, and offer numerous benefits to gardeners. Plus, the plants serve multiple purposes, which makes them an even more desirable option for those looking to repel moles from their gardens.
How to Plant Castor Beans
Planting Castor Beans may seem like a daunting task, but with the right preparation and knowledge, it can be quite easy. Here are the steps to plant Castor Beans:
| Step 1: | Choose an area with well-draining soil and good sun exposure. Castor Beans require full sun and will not grow well in shaded areas. |
| Step 2: | Prepare the soil by removing any weeds or debris and loosening the soil to a depth of at least 10 inches. Castor Beans prefer soil with a pH of 6.0 to 7.5. |
| Step 3: | Soak the Castor Bean seeds in a bowl of water for 24 hours before planting. This will soften the seed coat and increase the chances of germination. |
| Step 4: | Plant the Castor Bean seeds about 1 inch deep and 3 to 4 feet apart in rows. Cover the seeds with soil and water gently. |
| Step 5: | Water the seeds regularly but be careful not to overwater them, as this can cause the seeds to rot. Castor Beans require about 1 inch of water per week. |
| Step 6: | Watch for signs of growth, which should occur within 10 to 15 days of planting. Once the plants grow to about 3 inches tall, thin them to about 3 to 4 feet apart in the row. |
| Step 7: | Fertilize the Castor Bean plants with a balanced fertilizer every 4 to 6 weeks throughout the growing season. Be sure to follow the instructions on the packaging carefully. |
Following these steps will ensure that your Castor Beans grow strong and healthy, providing an effective repellent against moles. Remember to wear gloves when handling the seeds, as they can be toxic to humans and animals if ingested.
6. Euphorbias
Euphorbias are another effective plant that can act as a repellent for moles. This plant, commonly known as “spurge”, is a plant genus that consists of over 2000 species, and is a popular choice for gardeners because it can grow in a variety of conditions.
Benefits of Euphorbias:
- Produces a milky sap that repels moles and other burrowing rodents.
- Grows easily in most soil types and conditions, making it a versatile choice for gardens.
- Requires minimal care and maintenance once established.
- Produces attractive, colorful foliage and flowers that can add aesthetic value to your garden.
How to Plant Euphorbias:
- First, choose the variety of Euphorbia that is best suited to the growing conditions of your garden, taking into account factors such as sun exposure, soil type, and moisture levels.
- Prepare the soil by removing any weeds or other debris, and adding compost or other organic matter to improve soil quality.
- Plant Euphorbias in well-draining soil and space them out evenly, following the specific planting instructions for the particular variety you have chosen.
- Water regularly until the roots have established, after which Euphorbias require minimal watering.
- Trim back any dead or diseased foliage as needed to maintain the health and appearance of the plant.
By adding Euphorbias to your garden alongside other repellent plants such as daffodils and marigolds, you can create a natural and effective barrier against moles and other burrowing rodents.
Benefits of Euphorbias
Euphorbias are a diverse group of plants that have many benefits when it comes to repelling moles. Some of these benefits include:
- Natural Mole Repellent: Euphorbias produce a white, milky sap that has been known to deter moles. This sap contains a compound called diterpene esters, which are toxic to many rodents, including moles.
- Low Maintenance: Euphorbias are relatively low-maintenance plants, which makes them a great option for those who want an effective repellent that requires minimal attention.
- Versatility: Euphorbias come in many different varieties, from tall shrubs to ground-covering plants, so they can be used in a variety of landscaping designs to suit any gardening style.
- Drought-Tolerant: Some species of Euphorbias are drought-tolerant, which means they can survive in dry conditions without needing to be watered frequently.
- Attractive Appearance: Many Euphorbias have unique and appealing shapes and colors that can add interest to a garden or landscape.
Euphorbias are a natural, low-maintenance, and versatile option for repelling moles in your yard or garden.
How to Plant Euphorbias
When planting Euphorbias as a mole repellent, there are a few steps to follow:
- Choose the Right Location: Euphorbias prefer well-drained soil and sunlight, so it’s important to choose a spot that meets these criteria.
- Prepare the Soil: Use a garden fork to loosen the soil and mix in some compost or other organic matter.
- Plant the Euphorbias: Dig a hole that is slightly larger than the root ball. Place the plant in the hole and backfill with soil, gently tamping down as you go.
- Water Well: After planting, give the Euphorbias a thorough watering to help them settle in.
- Mulch the Area: Apply a layer of mulch around the base of the plants, being careful to avoid the stems. This will help retain moisture and control weeds.
It’s important to note that Euphorbias contain a milky sap that can be irritating to the skin and eyes, so wear gloves and take care when handling them. With proper planting and care, Euphorbias can be an effective and attractive way to repel moles from your yard.
Conclusion
In conclusion, using repellent plants is an effective and natural way to control moles in your garden. The six plants mentioned above, daffodils, alliums, marigolds, fritillaries, castor beans, and euphorbias, are all great options to consider.
It’s important to keep in mind that while these plants can help deter moles, they may not completely eliminate them from your garden. Therefore, it’s always a good idea to use a combination of different methods to control mole populations. This could include using mole traps or repellent sprays in addition to planting these repellent plants.
When planting repellent plants, be sure to follow the instructions carefully and give each plant the appropriate amount of space and sunlight. Additionally, consider the overall aesthetic of your garden and choose plants that will complement the look you’re going for.
Overall, using repellent plants is a cost-effective and visually pleasing way to control mole populations in your garden without the need for harmful chemicals. With a little bit of planning and care, you can create a beautiful garden that is also resistant to mole damage.
Frequently Asked Questions
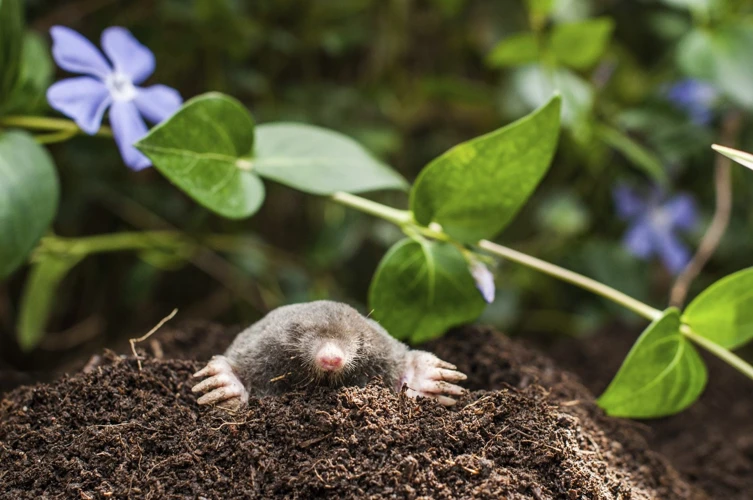
What are moles and why do they invade lawns and gardens?
Moles are small mammals known for their underground burrowing. They come up to the surface to find food, which could be earthworms, grubs, or other insects.
How do moles damage lawns and gardens?
Moles create tunnels underneath the soil, which can cause root damage, soil erosion, and unsightly mounds on the surface.
Are repellent plants the only way to control moles?
No, there are other methods such as traps, baits, and sonic repellents. However, using repellent plants is a natural and effective option for mole control.
Can repellent plants harm other animals or insects?
Repellent plants are generally safe for other animals and insects. However, it’s always a good idea to research each plant and its potential effects before planting.
What is the best time to plant repellent plants?
The best time to plant repellent plants is in the spring or the fall, when the soil is moist and the temperatures are mild.
How long do repellent plants take to grow?
The growing time for each repellent plant varies. Some may take a couple of weeks to grow while others could take months. It’s important to have patience and to follow the planting instructions for each plant.
Should I plant all of the recommended repellent plants or just one?
It’s not necessary to plant all of the recommended repellent plants. However, planting a variety of these plants could enhance their effectiveness in repelling moles.
How do I know if my repellent plants are working?
You can monitor the activity of moles in your lawn or garden. If you see fewer tunnels or mounds, then your repellent plants may be working.
Can I use repellent plants in combination with other mole control methods?
Yes, you can use repellent plants in combination with other mole control methods. It’s always best to consult with a professional exterminator before trying any combination of mole control methods.
Are there any drawbacks to using repellent plants?
One potential drawback to using repellent plants is that they may not work for all species of moles or in all types of soil. Additionally, some of these plants could be toxic if ingested, so it’s important to keep them away from children and pets.